
Slippage and price impact
Two numbers decide how good a price you get: price impact, how much your own trade moves the price, and slippage, how much further the price may move before your trade lands. GAMA shows both before you confirm, and turns your slippage into a Minimum received that the trade enforces.
Price impact
Every trade moves the price it trades at. On a bonding curve, each token you buy costs a little more than the one before; in a pool, your trade shifts the balance of the two tokens. The bigger your trade compared with what is available, the more your average price differs from the price before you traded.
GAMA shows this as Price impact, including fees: how much worse your average price is than the current price, with every fee included. For example, a buy on a standard token with no creator tax shows at least 1%, because of the 1% trading fee, plus whatever the trade moves the price.
- On a token's curve early in its sale, little has been bought and the price moves quickly: even a small buy can show a noticeable impact.
- In a pool, impact depends on how much liquidity the pool holds.
If the impact is higher than you like, trade a smaller amount, or spread your buys over time with a DCA order.
Slippage
Between the moment you see a quote and the moment your trade is in a block, other people trade too. Slippage is how far you allow the price to move against you in that time. GAMA turns it into a floor:
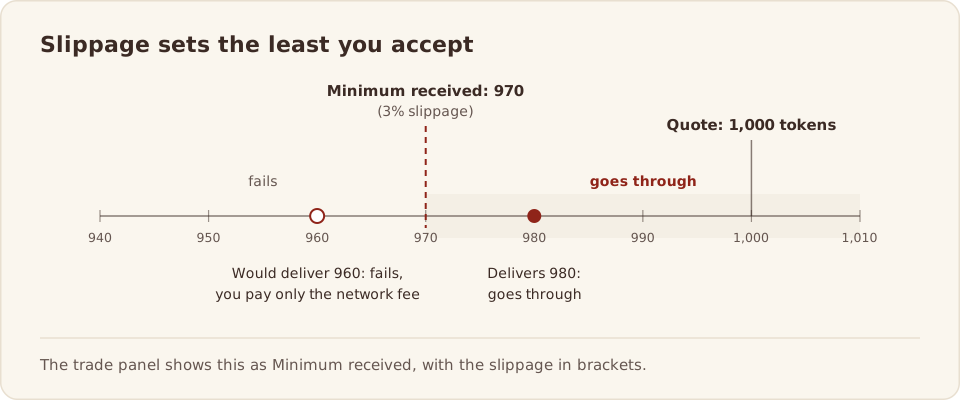
Minimum received is the quote less your slippage. If the trade would give you less than that, it fails instead, and nothing changes except the network fee you paid. For example, with a quote of 1,000 tokens and 3% slippage, the minimum is 970 tokens.
When you type in the receive box of a swap between pools, the floor is a ceiling instead: Maximum you pay.
Auto slippage
The slippage button sits at the top of the trade panel and the swap card. By default it is set to Auto: GAMA picks the slippage for each trade.
- 3% on launch curves, which move faster;
- 0.5% in pools;
- a little more for large trades: when a trade's own price impact is above 1%, half of that impact is added, up to 2 points more on curves and 1 point more in pools. For example, a curve buy with a 3% price impact gets 4.5%.
The button shows the value in use, for example Auto – 3%.
Setting your own
Click the slippage button to open Max slippage. Choose 0.5%, 1%, 2% or 5%, or type a Custom value with at most two decimals, below 100%. Your choice applies at once and is remembered in your browser; curves and pools each keep their own value. Click Auto to go back.
Above 5%, GAMA warns you: "High slippage can make your trade fill at a much worse price."
WARNING
High slippage makes a trade more likely to go through, but at a worse price: someone who trades just before you can leave you anything down to your minimum. Keep slippage as low as the trade allows. See Price impact and sandwiches.
Fresh quotes and deadlines
- Quotes refresh every 12 seconds while the page is visible.
- A quote older than 30 seconds cannot be sent. You see "Quote expired. Wait for a fresh quote before swapping." and the next quote arrives within moments.
- Every trade carries a deadline of 20 minutes. A trade that has not landed by then fails.
Slippage on DCA buys
A DCA order runs its buys later, at the market price each time, so its slippage protects each buy rather than one trade. Its slippage button works the same way, with one difference: Auto for a DCA that buys in a pool covers each buy's own price impact plus room for the price to move. If your own setting is lower than one buy's price impact, the order form tells you: "Your … slippage is below each buy's price impact, so buys will not fill. Use Auto or raise it."
GAMA's keepers add two protections of their own to every DCA buy: a buy waits while the price is more than 3% away from its three-minute average, and no single fill may move the price by more than 1%. See How orders fill.